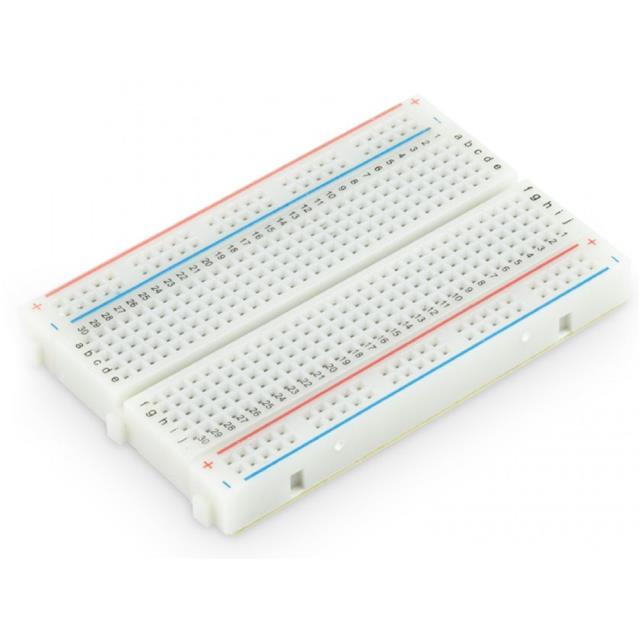
What is a breadboard?

Not long ago, I was TAing an electronics lab.
The goal of the lab was simple: build a blinking LED circuit.
It takes about 5-10 minutes to assemble the pieces if you don't have to dig for them.
I won't go into the incredible utility of a 555 timer but suffice it to say; it's a pretty cool IC for beginners and advanced people alike. Anyway, the story's point is that I had about twenty students in front of me trying to build a circuit.
Why is that worthy of a story?
Well, none of them knew what a breadboard was!

If you're here, I assume you may be slightly unsure of your breadboard knowledge. I had to teach about half of the first-year EE student body how to use a breadboard before they blew something up. Too bad a half-dozen polarized capacitors would still meet their end throughout the lab.
A breadboard is a tool for developing prototypes of electrical and electronic circuits. Groups of 5 slots are shorted together by a copper bar on the back.
Looking at the provided picture, you'll see red lines drawn in different locations. That shows the areas which are all the same node.
Connecting something at A1 is connected to B1, C1, D1, and E1.
Anything on a + or - row is connected to all points (1-30) of that column. If you wanted to attach something to a resistor with one wire connected to A1 and one to C1, you would plug in the wire going into it at A2 and the wire coming out of it at C2. You could also use A3, C4, or any combination thereof. The important thing is that it's on the same letter series. If you want to create a 5V rail, plug your 5V into any + slot and your GND into any - slot. Now you have a ground rail and a power rail that you can tap off of. I usually use one red rail for 5V and another for 9V or 20V, depending on what I'm doing.
Now, you may be asking, what breadboard should I get? I've used a few of them, and these are my favorite. They're well-labeled, look nice, and always have easy-to-use slots. Some poorly manufactured breadboards have excessively loose or excessively tight connections. There's not that much else to say. I used a mixture of these jumper wires and bought this jumper kit. I like the kit jumpers because they're much more organized and neat when you're done. Having dozens of jumper wires running everywhere makes things difficult. They still work well, though. Something else you might consider buying is these female-to-female jumpers if you have male pin headers. They're cheap, so it's an excellent item to have around just in case you need an extension wire for something. Anyway, that's about everything you need to get started with the rapid prototyping capabilities of breadboards.


Member discussion